POSSIBLE REASON
Suggested Actions
Main Key is not turned ON

Battery Isolators not turned ON
(Dangerous Goods Model only)

E-Stops not released
There are three E-Stops fitted to the Sidelifter.
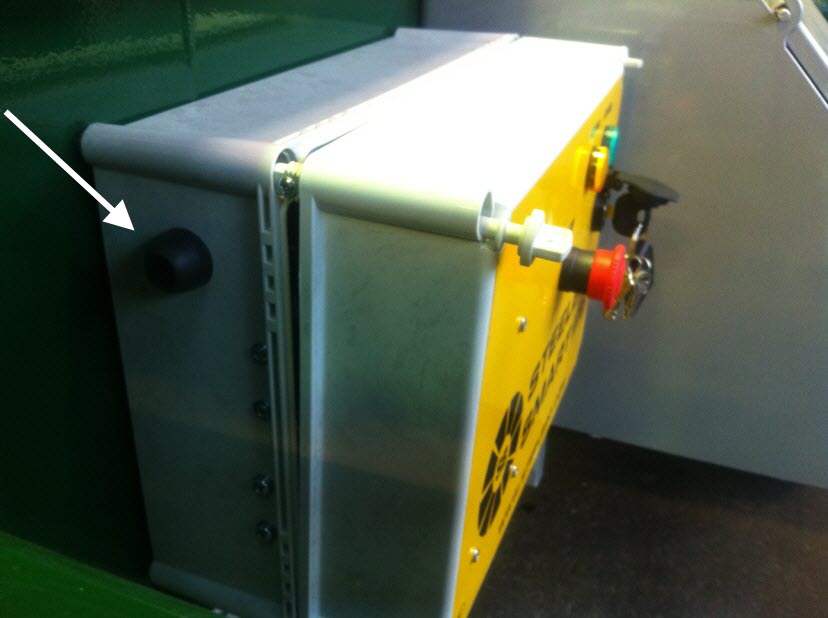
1. Front E-Stop.
Located on the front coupling area of the Sidelifter.
Twist the E-Stop button clockwise to release.
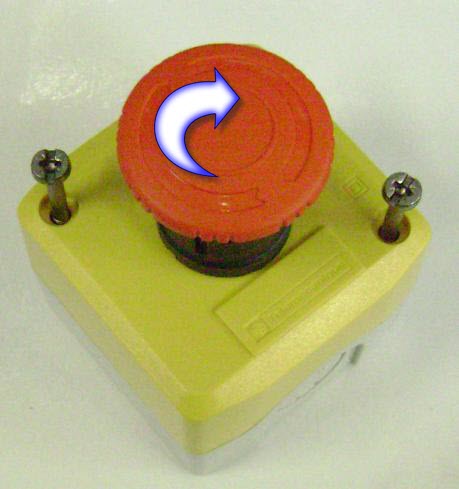
2. Main Control Box E-Stop.
Located on the Main Control box.
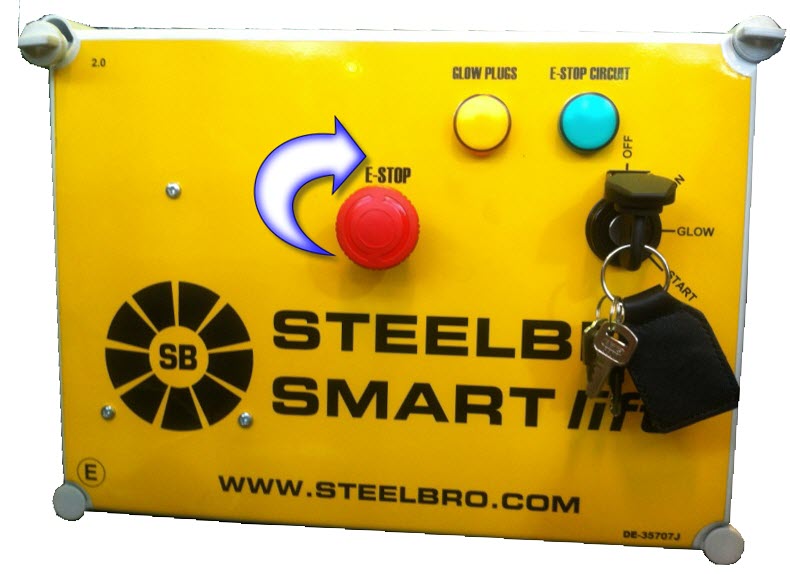
Twist the E-Stop button clockwise to release.
3. Remote E-Stop.
Located on the Radio Remote Control Transmitter.
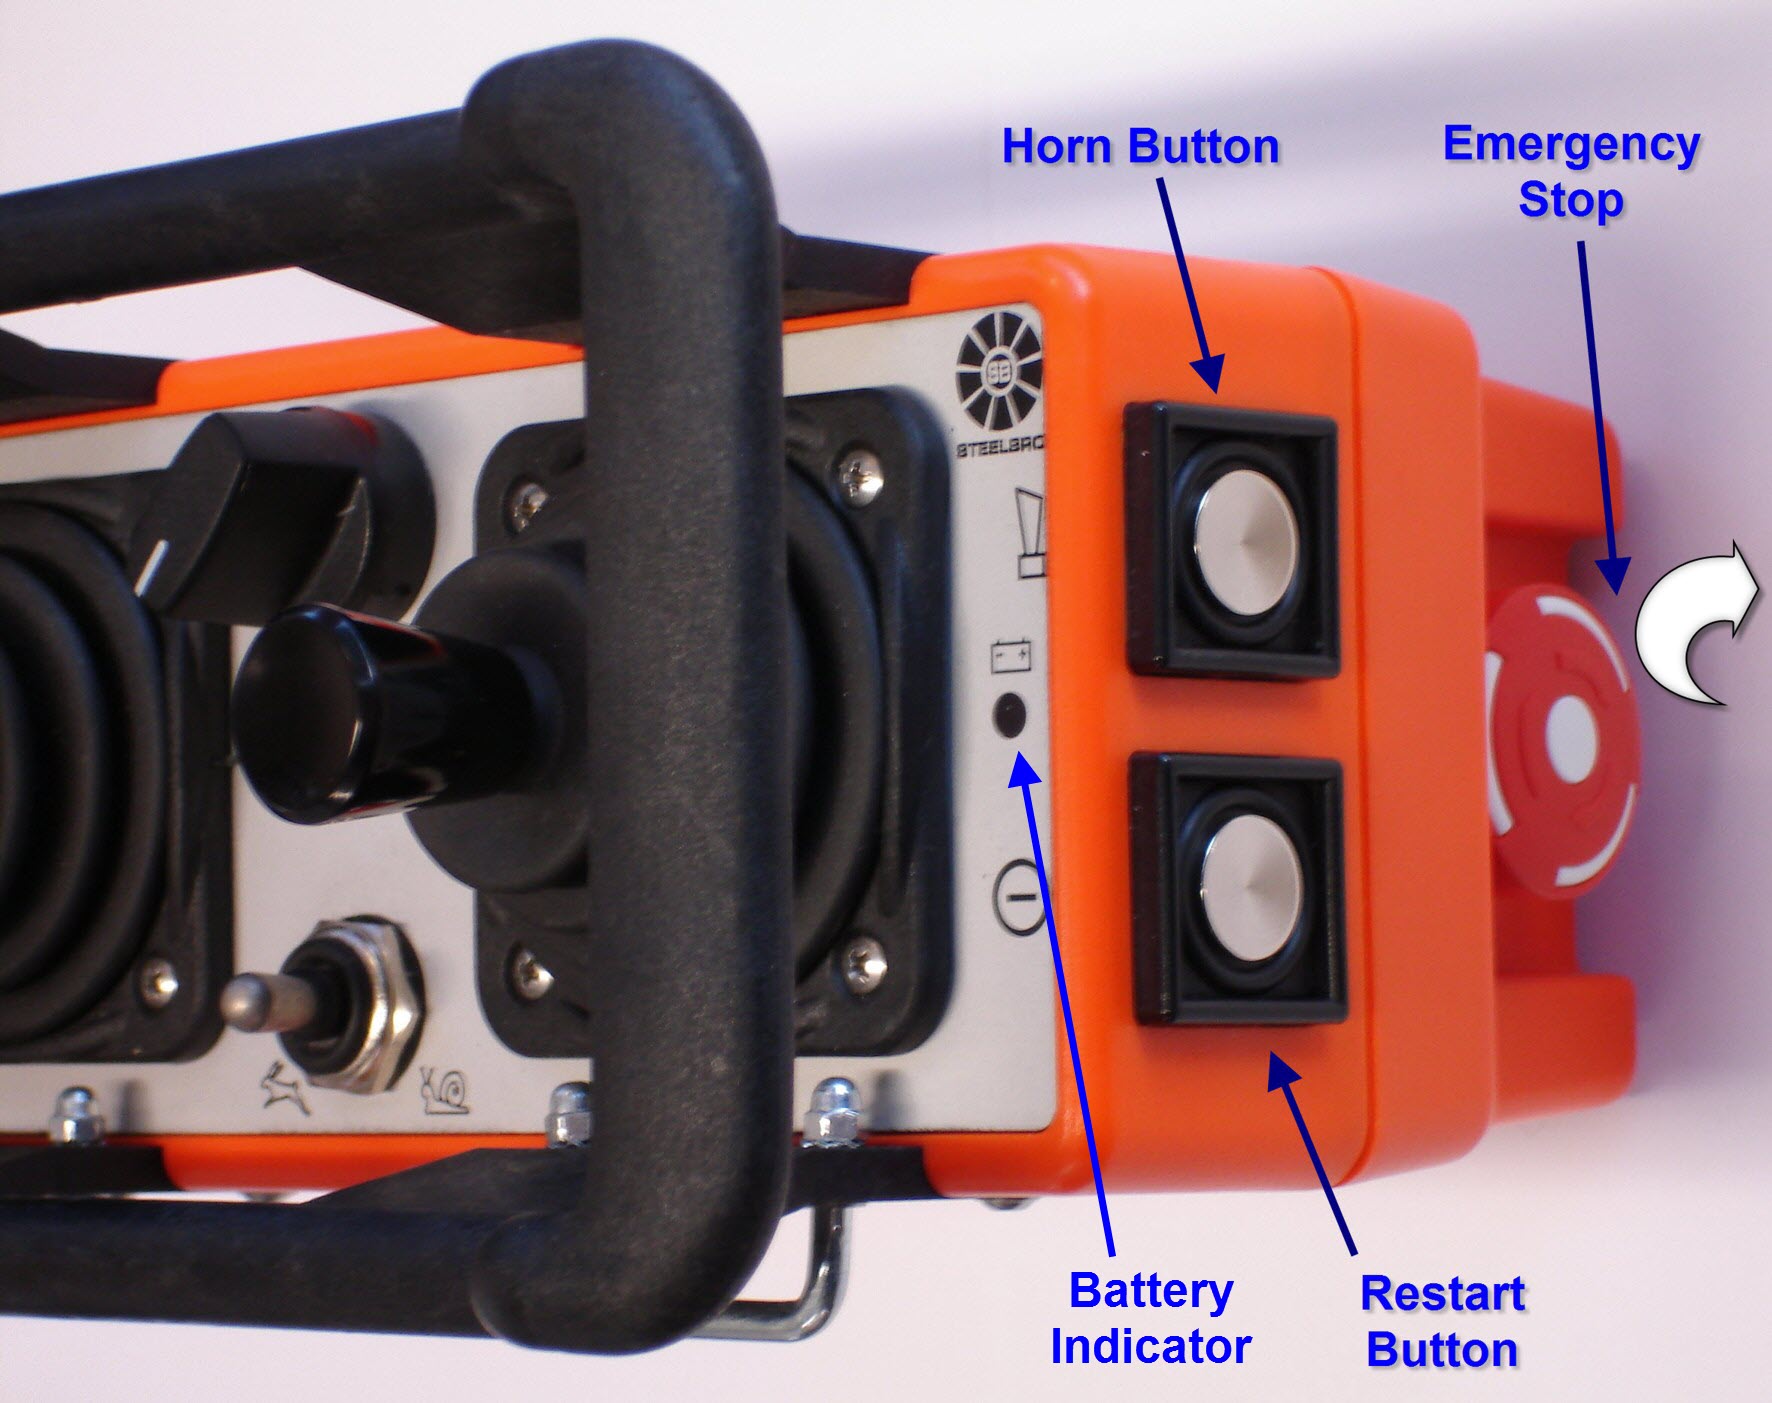
Twist the E-Stop button clockwise to release.
Radio Remote not Started
When the main key is ON and all the E-stop buttons are released then the system can be started.
Press the restart button on the radio remote. The green battery indicator LED should be ON. If not then replace the transmitter battery with a fully charged one. Press the restart button again.
The system should have started. Check that:
- On the main control panel the green E-Stop Circuit light is ON showing that E-stop circuit has been released.
- The SMARTlift display screen is active and should show some graphics and text.
Flat Batteries
There are two batteries on the Sidelifter:
- ECU battery (for SMARTlift electronics)
- Main battery (to start the powerpack engine)
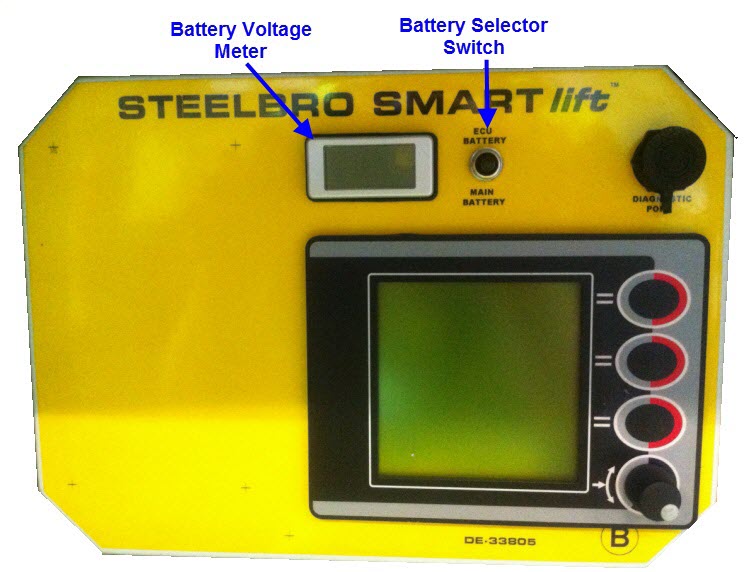
ECU Battery
Push the battery selector switch up on the SMARTlift display panel to read the voltage of the ECU battery. The ECU battery voltage should be above 12 volts. If the voltage is below 11 volts then the battery voltage is too low to start the system. Refer to "Starting the system with a flat ECU battery"
Main Battery
Push the selector switch down on the SMARTlift display panel down to read the voltage of the main battery. The main battery voltage should be above 12 volts. If the voltage is below 11 volts then the battery voltage may be too low to start the system.
If the voltage is too low, charge the main battery or attach jumper leads from another vehicles battery and then retry the start procedure. The main battery is located on the power pack.