- Unscrew the cable gland nut from the connector back shell then unscrew the connector plug from the connector back shell.
The plug will now look as it does in Fig 1.
Take care not to twist the wires too much as they may break.
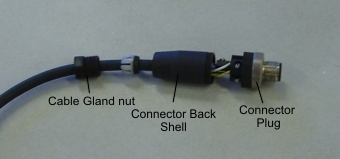
Fig 1 Shows the plug disassembled.
- Spray the wire side (as shown in Fig 2) of the plug with electrical contact spray, ensuring all wires and connectors are well coated with spray.
- Check that Connector seal is present and seated correctly. This is the O-ring sitting between the outer and inner housings (shown on Fig 2)
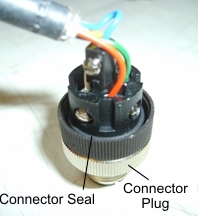
Fig 2 Wire Side
- Screw connector plug back onto the back shell, ensuring that it is screwed in completely.
Fig 3 shows a correctly fastened plug, and one incorrectly fastened where thread is still showing. The connector seal causes the last few turns to have a much higher resistance so it is important to ensure the plug is securely screwed all the way home.
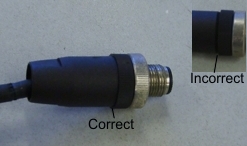
Fig 3
- Slide the gland back into the plug then screw in the gland nut. This may require more torque to screw home than just finger tight and tools may be required in some instances
Fig 4 shows the correct and incorrect amounts of thread showing after screwing the nut home.
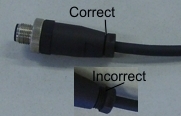
Fig 4