SL0007 Hetronic Replacement Transmitter Setting-Up
SL0007 PDF File
|
Version 2
|
SMARTlift
|
13/01/05
|
When a replacement Hetronic Transmitter is supplied for an existing system the following procedure must be followed to set the Transmitter up.
Make sure that all the ADMO Security Chip numbers are the same in the transmitter and the receiver. If necessary order a pack of three ADMO Chips from Steelbro part number EL-33814.
Make sure that the battery is removed from the transmitter, and that the starter key is switched to the OFF position.
Change the DIP switch settings of the new transmitter to match those of the receiver.
For a standard (ie not SMARTlift) system this is all that is required.

|
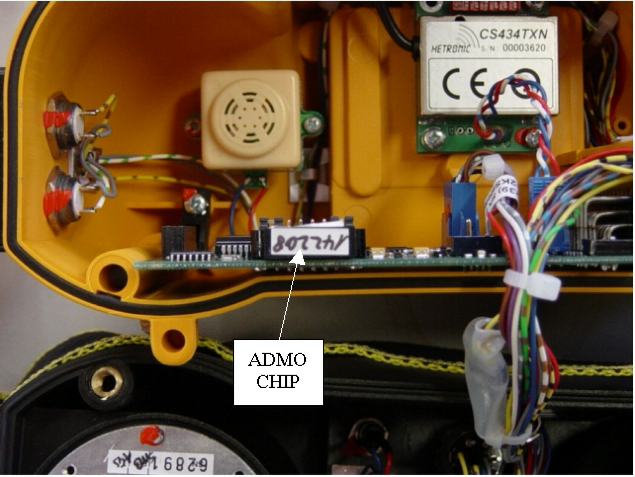
The transmitter always contains one ADMO Security Chip. For Standard Radios the receiver contains two ADMO Chips. SMARTlift receivers only contain one ADMO Chip but an additional procedure must be followed according to the instructions in Section 2 of this document.
|
|
Figure 1 – Transmitter ADMO Chip
|
|
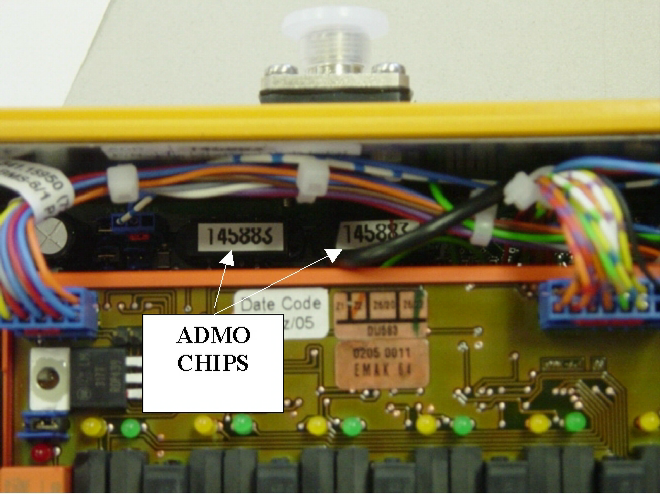
Figure 2 – Standard Receiver ADMO Chips (replace these to match the new transmitter)
|
|
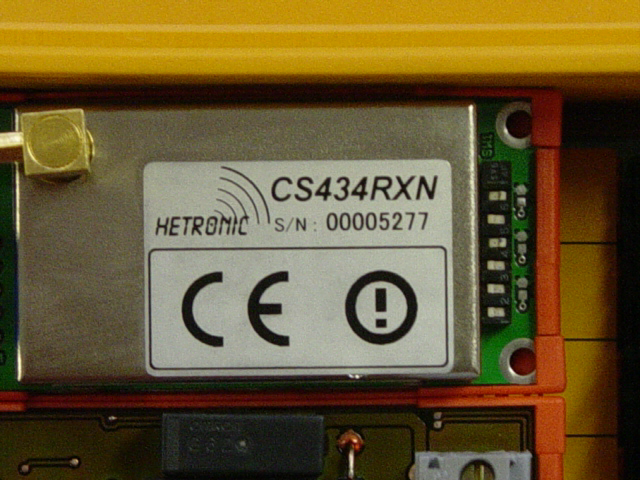
Figure 3 – Receiver DIP Switch Settings (NEVER TOUCH THESE)
|
|
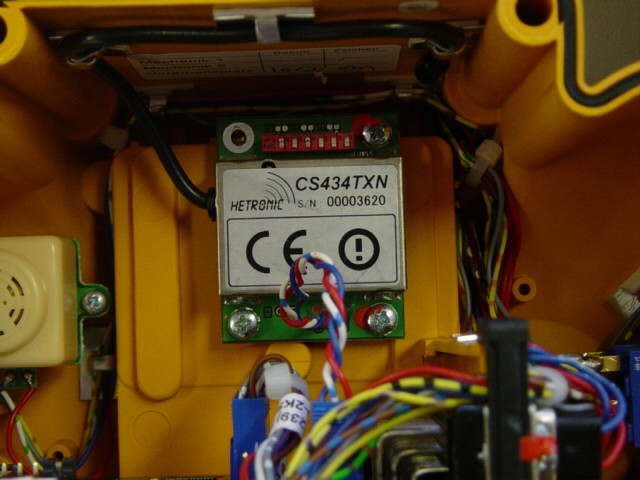
Figure 4 – Transmitter DIP Switch Settings (make sure these match the Receiver)
|
Section 2 – Changing ADMO Chip in a SMARTlift Receiver

|
Figure 5 – SMARTlift Receiver
|
Follow the procedure below only if you are replacing the ADMO security chip in the receiver for SMARTlift systems.
- This procedure assumes that you have lost the original transmitter and Steelbro have replaced it with a new one, including two new matching ADMO Chips. A SMARTlift Receiver only has one ADMO Chip, however the circuit board also remembers the ADMO chip number, so simply changing the ADMO chip will not work, the new ADMO chip number must be programmed onto the board using the SMARTlift Display.
- With the Starter Key in the 'OFF' position. (inside the receiver wait until the orange LED stops flashing before proceeding, this may take a couple of minutes)
- Replace the ADMO chip in the receiver and make a note of the DIP switch settings.
- Remove the battery from the transmitter and replace the ADMO chip and set the DIP switches on the transmitter to match those on the receiver.
- Make a note of the ADMO chip number.
- Turn 'ON' the SMARTlift system. The E-Stop circuit will work but the joysticks, buttons and switches will not work.
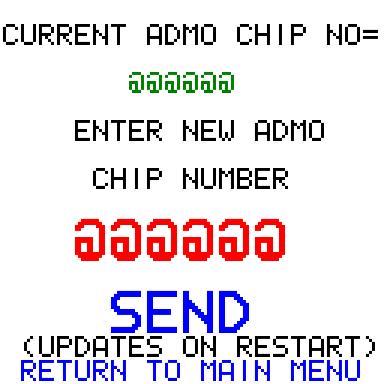
- On the Display from the Main Menu, enter the Manufacturers Area (using PIN available from Steelbro) and choose 'CHANGE ADMO CHIP NUMBER'.
- Change the ADMO Chip number to match the one installed in the Receiver, then select and press 'SEND'.
|
Figure 6
|
- Turn off the transmitter, and turn the key to the 'OFF' position. Wait until the orange LED in the receiver stops flashing.
- Restart the Sidelifter and test all the functions. Report any problems to Steelbro.